Lesson Objective Stickers
Lesson objectives (L.O.) provide a lesson with purpose and an end goal/target for learners to focus on. It must be understandable for all children and reflect the teacher's high yet realistic expectations for their class. Whereas some teachers keep their L.O. on display on something such as a whiteboard, or have their pupils copy t out word for word in the book, I found my placement school's policy far more effective.
On GPP, teachers produced their lesson objectives onto small sticker. These were usually stuck underneath the date on a fresh page in the pupils' work books. This method proved to be a less time-consuming and allowed the pupils to refer back to the objective throughout the lesson and became something of a focal point whenever they had to write a conclusion to their learning in a lesson's plenary.
Below is a step-by-step guide to produce these stickers. It should take no longer than 2 minutes if one has a lesson objective already in mind.
1. Open Microsoft Word and choose the "Mailings" option along the top of the page. From here, select the "Labels" button.

2. From here, an option box titled "Envelopes and Labels" shall open. Select the "Labels" tab and go into "Options".
(From here, it is suggested that you double-check with your AT (Accredited Tutor) or another member of staff the exact size of stickers the school uses. However, in most cases, sticker size is fairly consistent).

3. Another box opens titled "Label Options". Set the necessary printing requirements to the following:
Page printers should be selected.
Tray: Default tray (Sheet).
Label vendors: Avery A4/A5.
Product number: L7161
Conclude by pressing the "OK" button, taking you back to the previous options box. Press the "New Document" button.

4
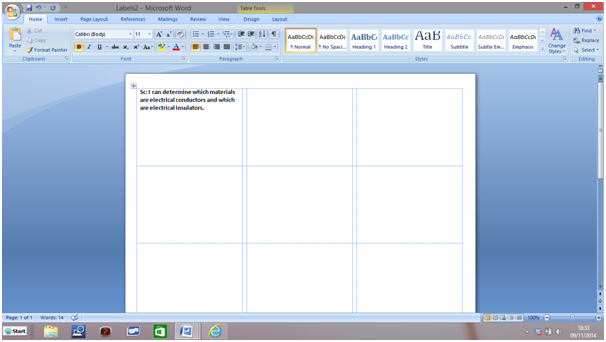
. A new Word document should now open filled with 3 x 6 rectangular text boxes. From here, select the first text box and write the Lesson Objective or Success Criteria you have in mind for your planned lesson.
. A new Word document should now open filled with 3 x 6 rectangular text boxes. From here, select the first text box and write the Lesson Objective or Success Criteria you have in mind for your planned lesson.
5. This next step is optional, but should you choose to make your L.O. sticker for colourful/child-friendly, open up Google Image and find a child-friendly image that is relevant to your lesson objective.
(As seen below, here is an image search for child-friendly images related to electrical circuits).

6. Once you have found an appropriate image, simply copy and paste it into your first text box and adjust the image's size so that it is comfortably within the margins.

7. At this final stage, highlight your completed first text box and copy and paste it into the two other boxes on the top row. from here, to save time, place your mouse cursor in the left-hand margin of the page alongside the top row. click, and the entire top row should be highlighted. Now it's just a matter of copy and pasting as many rows of stickers that you need (CTRL + P) and then printing.

